Create a Footer Menu
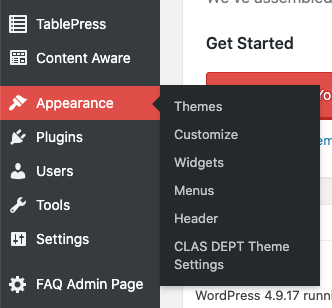
In the black left tool bar on the dashboard, hover over “Appearance” and select “Menus”

You will need to have three (3) footer menus, so follow these steps for each one.
- Once on the Menu page, click “create a new menu”

- Give the menu a name and click “Create Menu”

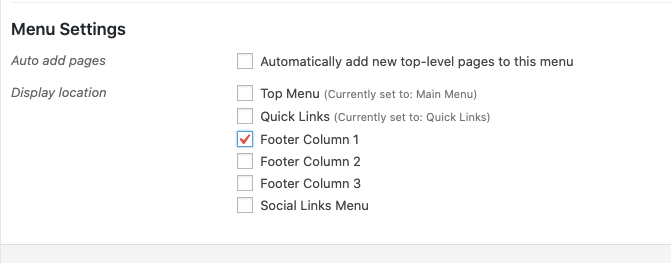
- A “Menu Setting” section will appear, click the box for “Footer Column 1”

- Add any pages, posts or external links you’d like to this menu and click “Add to Menu”

*If you are linking to an external site, please set the link to open up in a new window by clicking the down arrow and checking the box for “Open link in a new tab”

- Once the menu is complete, click the red “Save Menu” button
- Repeat these steps for Footer 2 and Footer 3
Want to add your Department, Center or Lab’s social media profiles to your site? Click here for information on how to do so.