The Publications page displays a collection of WordPress posts that have each been assigned to a category. The available post categories correspond to the headings on the page.
Therefore, to add a new Publication, a new WordPress post must be created.
1. Hover over + New in the WordPress admin toolbar at the top of the page,
then select Post.

2. Use the Add Media button and upload the PDF file of the new publication to the website. Skip this step if the PDF file has already been uploaded.


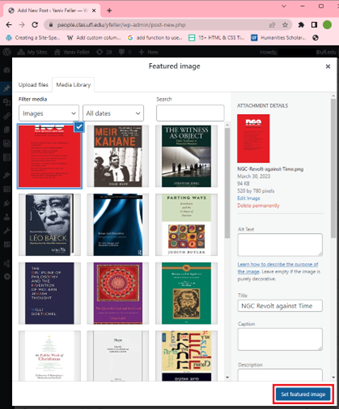
3. Use the Add Media button and upload the image file of the new publication to the website. In this screenshot, the image file is the Journal cover saved in a .png format. Skip this step if the image file has already been uploaded.


4. Scroll to the bottom of the page to set the uploaded Publication image file as the post’s Featured Image.

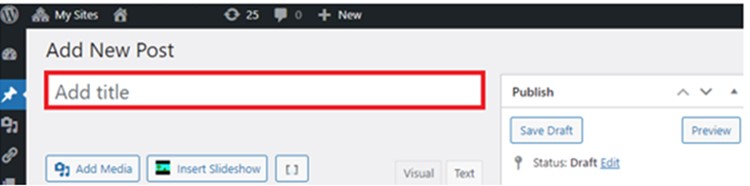
5. Enter the post title.

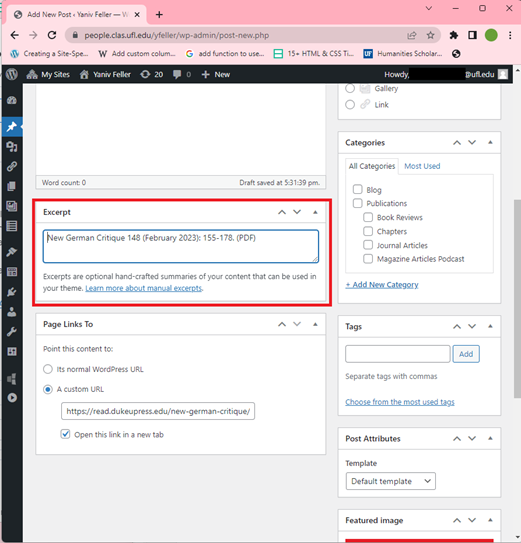
6. Scroll to the Page Links To box on the page to set the hyperlink of the clickable post title. In this screenshot, the hyperlink is to an external website that hosts the text of the publication itself.
Note that the radio button A custom URL must be selected for the textbox to enter the hyperlink to appear.
It is best practice to select the checkbox to Open this link in a new tab when linking to external websites.

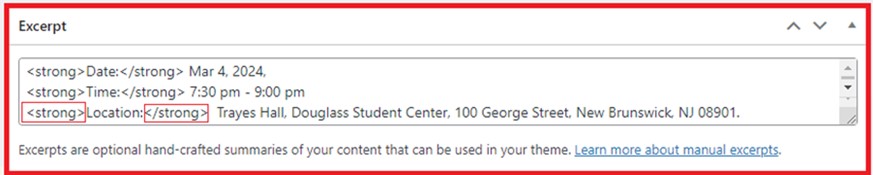
7. a. Scroll to the Excerpt box to enter the citation information. (If you don’t see it, go to the Screen Options in the upper right corner and look for the word “excerpt” with a tickbox next to it and tick the box. After that, the excerpt should show.)
b. Add HTML tags <em></em> around the Journal title to indicate italics.
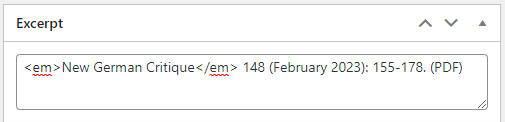
c. Add HTML tags <a></a> added around the word “PDF”
d. Type the parameter href=”” in the opening tag: <a> → <a href=””>
e. Paste the hyperlink of the uploaded PDF file of the new publication between the quotation marks of the href parameter.
How to Get URL of File Uploaded to Media Library
f. Include the parameter target=”_blank” to set the PDF to open in a new tab when the link is clicked.

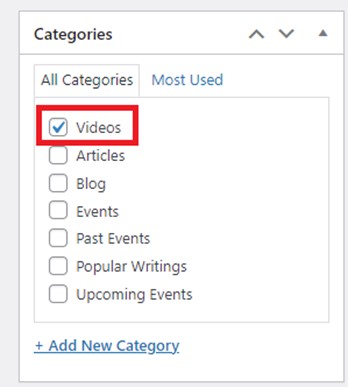
8. Scroll to the Categories box to assign the relevant category to the post.

9. Publish the post

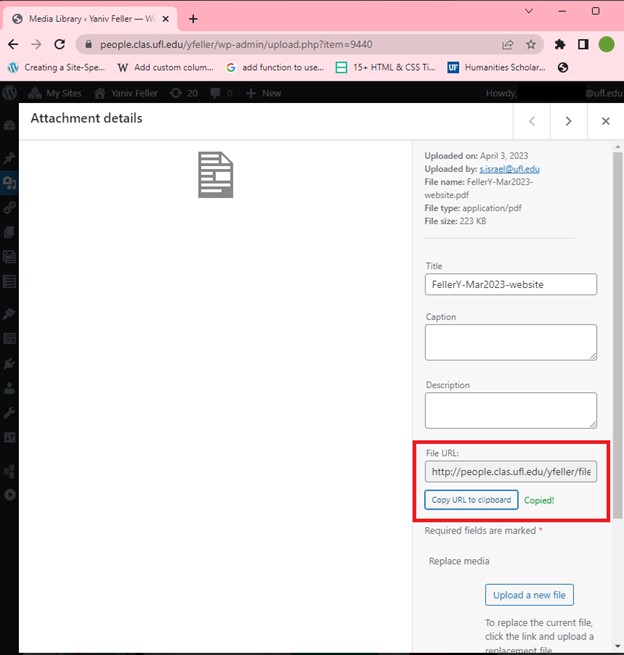
How to Get URL of File Uploaded to Media Library
1. Go to the Media Library
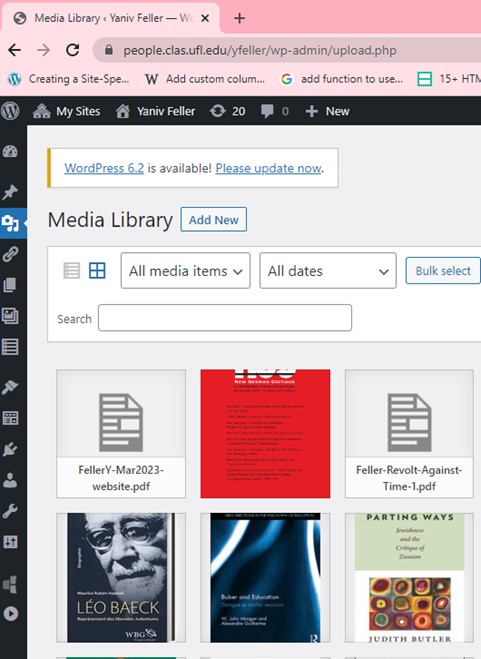
2. Click on relevant file to bring up the Attachment Details window, then select Copy URL to clipboard.
How to Add a New Event to an Events page
An Events page displays a collection of upcoming events that have each been assigned to a category. Therefore, to add a new Event, a new WordPress post must be created.
1. Hover over + New in the WordPress admin toolbar at the top of the page, then select Post

A window like this one will open.
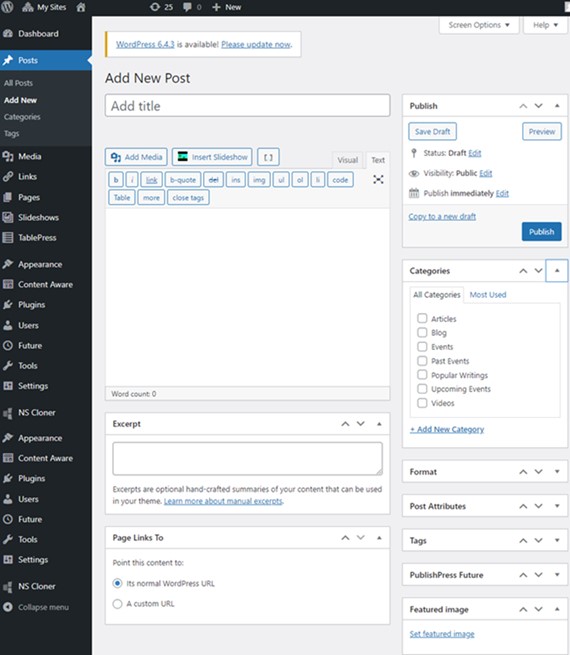
2. The structure of the published event is as follows, which helps visualize the fields to be filled in.

a. Add event title
b. Insert the extract; it is what appears below the title. To make it bold, use the <strong> tag at the beginning and </strong> at the end of the desired text.
c. Select the category ‘Upcoming Events’.

d. Add the link to the event if available.

If you want the event to open in a new window, click on ‘open this in a new tab’; otherwise, the link will open in the same window where the event is published.
e. In the ‘PublishPress Future’ section, you can choose a date for the event to change categories on that date. This allows the event’s end date to be shifted from ‘Upcoming Events’ to ‘Past Events’ when the specified date is reached.
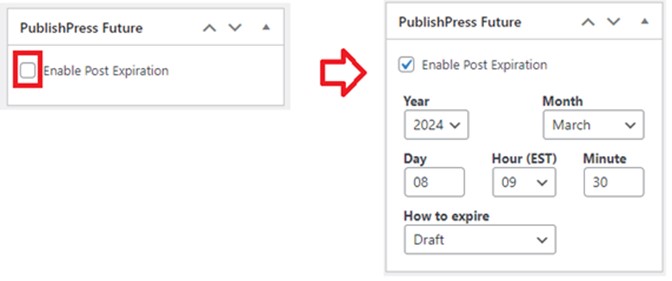
In PublishPress Future, select ‘Enable Post Expiration’.
Set the event date so that it transitions to the next category on that day (it is recommended to choose the last hour to keep it published throughout the entire day).
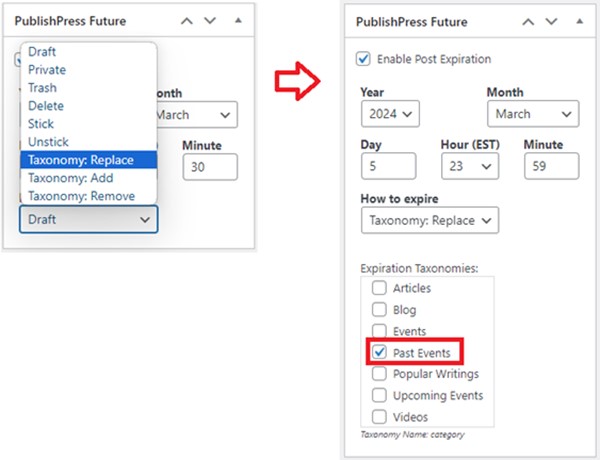
In How to expire, choose the option ‘Taxonomy: Replace’ and select ‘Past Event’.
f. In the Featured Images section is where we will upload the image related to the event.
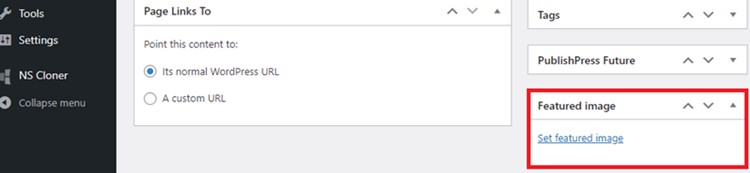
Click on ‘Set Featured Image.’ A window will open where you can see the images already uploaded. If you choose to select an image that is already in the gallery, you can do so.

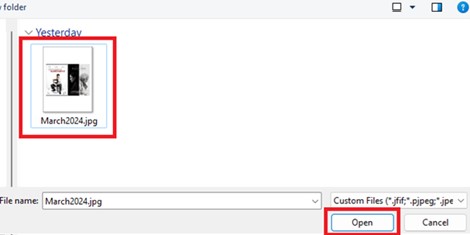
If you need to upload a new image, click on ‘Upload Files’ and then on ‘Select Files’.

Select the image.

3. Finally, click on ‘Publish,’ and the event will appear on the events page, specifically under ‘Upcoming Events.’

Whenever you need to modify the event, you can edit and update it.
How to Add a New Video or Podcast to a Video page
A Video Archive page showcases a collection of videos, each assigned to the ‘VIDEOS’ category. To add a new video, you need to create a new WordPress post.
Your video page may or may not include podcasts. In case it does, the procedure for uploading a podcast is the same as uploading a video.
1. Hover over + New in the WordPress admin toolbar at the top of the page, then select Post

A window like this one will open.

2. The structure of the published video or podcast is as follows, offering a visual guide for the fields that need to be filled in.
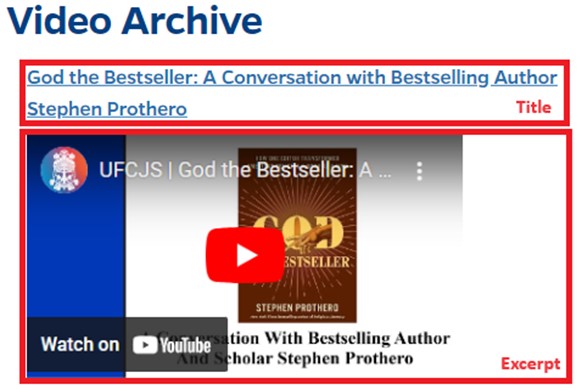
a. Add Video or Podcast title

b. Choose the category ‘VIDEOS’ or ‘PODCASTS’.

c. Insert the excerpt; this small code is obtained from the video we want to upload and depends on the platform where the video is hosted. The video code is always found within tags called <iframe>.

To extract the <iframe> code from a YouTube video:
– Open the video on YouTube.
– Click on “Share“, right below the video, click on the “Share” button. It’s located underneath the area displaying the view count and the “Like/Dislike” buttons.
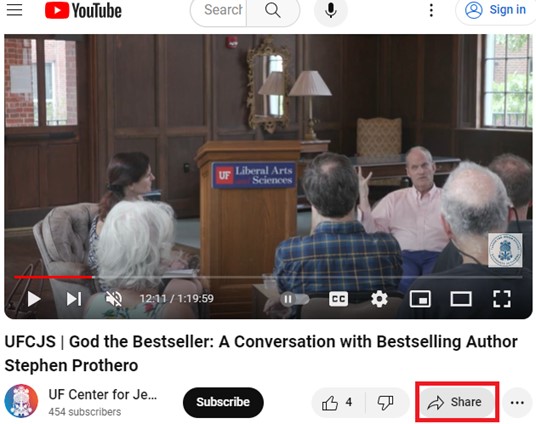
– Click on “Embed“, select the “Embed” option from the menu that appears after clicking on “Share”.

– Simply copy the code provided in the box. This <iframe> code is what you need to embed the video on your Excerpt.

– In the case of videos or podcasts embedded within a page, the process is similar. Typically, when you click on ‘Share,’ it should provide the same ‘Embed’ option. You’ll also find the <iframe> code that you can copy into the excerpt.

Note: In the <iframe> code, there are width and height attributes that determine the dimensions of the video when displayed on the page. Typically, it comes with a default of width=”560″ and height=”315″. If it comes in a different size, you can modify the code to these dimensions, or alternatively, set the dimensions you prefer the video to appear in.
3. Finally, click on ‘Publish,’ and the event will appear on the events page, specifically under ‘Upcoming Events.’

Whenever you need to modify the event, you can edit and update it.