Create a Form
To create a form, login with your UF email and password by adding /wp-admin to the end of your website URL.
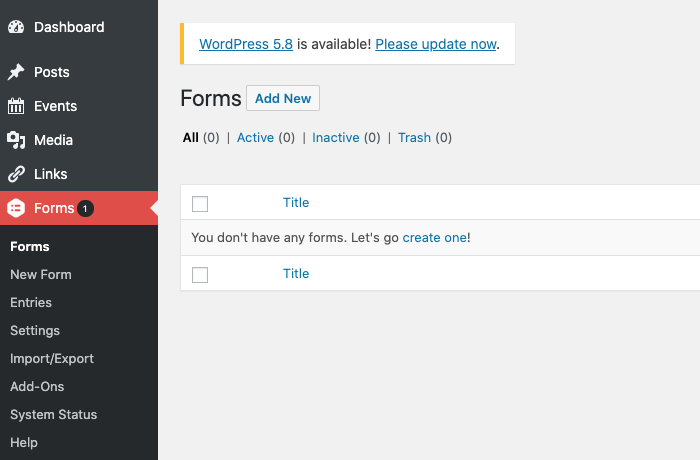
In the black left hand tool bar, click on Forms then click Add New.

Enter in the form title and an optional form description. Then click Create Form.
You will be directed to the form creation page. Here you can add different types of form options by dragging items from the right and placing them on the left.
The general fields you will be using are Standard Fields and Advanced Fields.

Once a block is dragged from the right to the left, you can edit the title of that block and edit the options within that block.
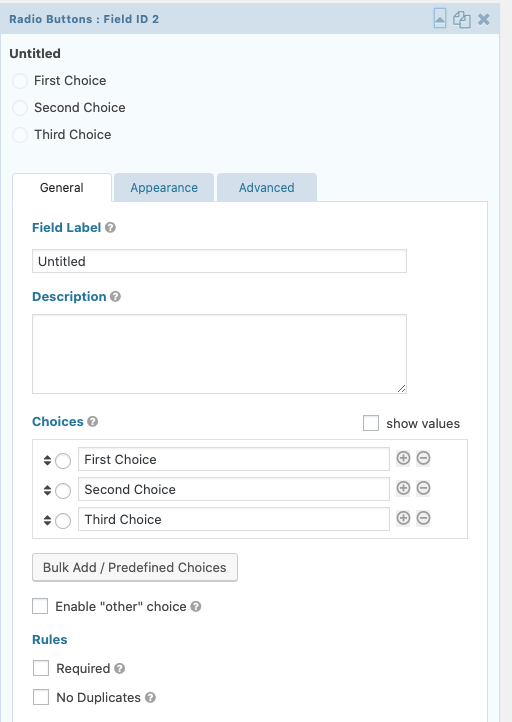
For example, if you want your form to have radio buttons (only one select) or checkboxes (multiple selects), drag and drop that box to the left and click into the block it created on the left.

From here, you can edit the Field Label and edit the Choices labels. You can add more to the choices and remove extra ones you don’t need. You can even set the options to have this box be required for submission.
You can add other options, such as single line text (for shorter responses) and paragraph text (for longer responses) and edit the Field Label accordingly so users can type in their own response.
Under Advanced Fields, you have options to add pre-labeled form boxes, such as Name, Date, Email, Phone Number and File Upload. Simply click into the Advanced Fields box and drag it the necessary block the right to the left.

Once your form is complete, click the red “Update” button.
Form Settings
Once a form is created, you can customize the form settings by clicking the “Settings” tab on that form page.

The two main items you want to the customizing are Confirmations and Notifications.
Confirmations is the form confirmation the user receives once a form is submitted. You can stick with the default confirmation or create a new one.
Notifications is where/who the form is being submitted to. It is standard to only update who the form is being submitted to and nothing else. In the “Send to Email” box, enter in the email the form should be submitted to and press the red Update Notification.
Seeing Entries
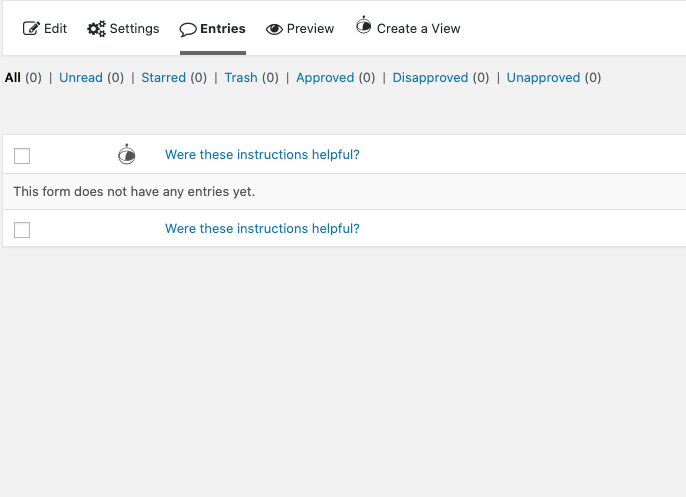
To see all form entries via WordPress, click on Entries in the top Form navigation. This will show all entries to the form. You can click into each entry to review it.

You have the option to view all Starred, Trashed, Approved, Disapproved and Unapproved entries to that form.
Add a Form to a Page
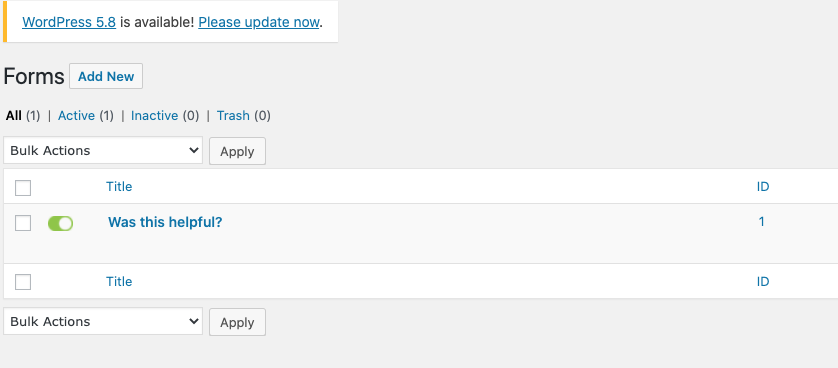
To add a form to a page, click on forms to view all forms and scroll down to the form you want to add. On the right, you’ll see basic form details such as ID, Entries, Views and Conversion.
The detail you need to add the form to a page is ID.

Next, go to the editing area of the form page. You will copy and paste this code onto the page where you’d like the form to be placed, substituting ID with your form’s ID.

If you want the form title and/or description to appear on the page with the form, change “false” to “true” and then click the red “Publish” or “Update” button on the top right of the page.